Please Have Pity On ME, Vintage Revivals! I'm Begging!


Hi friends! I am swallowing my pride and showing you what my real life is like because I am DESPERATE. I feel like I am living a lie in having this blog because I am not crafty person and my house is....in need of some major help. If you didn't know this, I started this blog to save ideas of things I wanted to do and make when I got some time SOMEDAY!


I am entering the Vintage Revivals Epic Room Makeover in hopes that I get some much needed help.


This is the short of a VERY LONG story!!!!

When my husband and I were getting married, we thought about our future. My husband doesn't make a ton of money and if I ever wanted to be a stay-at-home mom, we knew we needed to buy an inexpensive house, preferably one that had a basement apartment in it. We live in a college town with many older homes that have basement apartments. We started looking and found a house that we THOUGHT would help us with our situation. It had a large upstairs (that needed work, but had so much potential) and a basement apartment (that needed A LOT of work) and a barn that had 2 bathrooms, a small kitchen a bedroom and a loft. Totally fun!!!! We bought it!


We feel like MANY things should have been disclosed to us that weren't. For example, it used to be a drug house. We are talking drug bust, SWAT team, prison time, newspapers and all! It had been flooded from the top of the 3 stories because it got foreclosed on and the people were mad. The roof in the barn leaked. And this is just the beginning. There were many things wrong. Yes, we did get an inspection, but some things don't show up when they are behind walls and ceilings or until you move in and start living there:( ALL of these things added some major unexpected costs and time that we were not planning for!

We rented out the upstairs, gutted the basement and remodeled it and lived in the barn for 2 years. When we finished the basement and our first child was born, we moved into the basement and lived for 2 years. Right before our second child was born, we moved into the upstairs. It has 5 very small bedrooms (the house is almost 100 yrs. old) and 2 full baths. I thought this would fit our needs for years to come.

The problem is that every room upstairs needs work too and by work, I mean tear down the lathe and plaster, insulate the walls, update the electrical etc.. SLOWLY, we have been going through working on the house. BUT it is overwhelming with 2 small children who want to be involved, a lack of money and time, and some problems that we don't know what to do about. My dream to be a stay-at-home mom, unfortunately, has not worked even with basement renters.

In order for us to work on our house and to do any sort of recreation activities or vacations or do anything beyond mere survival, I work 5 hours a day at a Montessori pre-school (and the kids get to come with me.) It is the best job I could think of having at this time. I could go back to work as a Special Education Teacher, but I would be gone 8-9 hours a day without my kids and be stressed and exhausted for 10 months of the year. I would make more money, but the money is NOT worth the trade off of letting someone else raise my kids.

My daughter keeps asking when we are going to move to a new house. I am embarrassed of our rough house. It's not decorated because it is not in budget. Some days I cry thinking "What in the world did we do to ourselves in buying this house?" It is overwhelming. The work is slow and sporadic. I feel like I'm drowning in despair some days. With baby #3 coming in 2 months, I just wonder how we are going to get anything done.

I could use help in any of the rooms. I have photos of four of the rooms that would love some Vintage Revival assistance.

This winter my husband put a wood burning stove into the fireplace. I wanted gas burning, but he won. This is what our fireplace looks like now. When you walk into our house, this is what you see! YUCK!!! It needs help. I will take any advice on what to do with it! Obvisiously, I need help decorating the mantle too!


Our front room is blah. Hand-me-down couches, one picture on the wall and my husband's huge bachelor lifestyle TV. That's it! This entry room needs some major help.


We've already done a few things to the upstairs bathroom, but you wouldn't be able to tell. The wall paper and paint is just so lovely (please sense the sarcasm). Most people think the bathroom has such potential. That's what I keep telling myself.


Don't be jealous of the paint job on the door! You could probably pull something like this off in your own home!!!

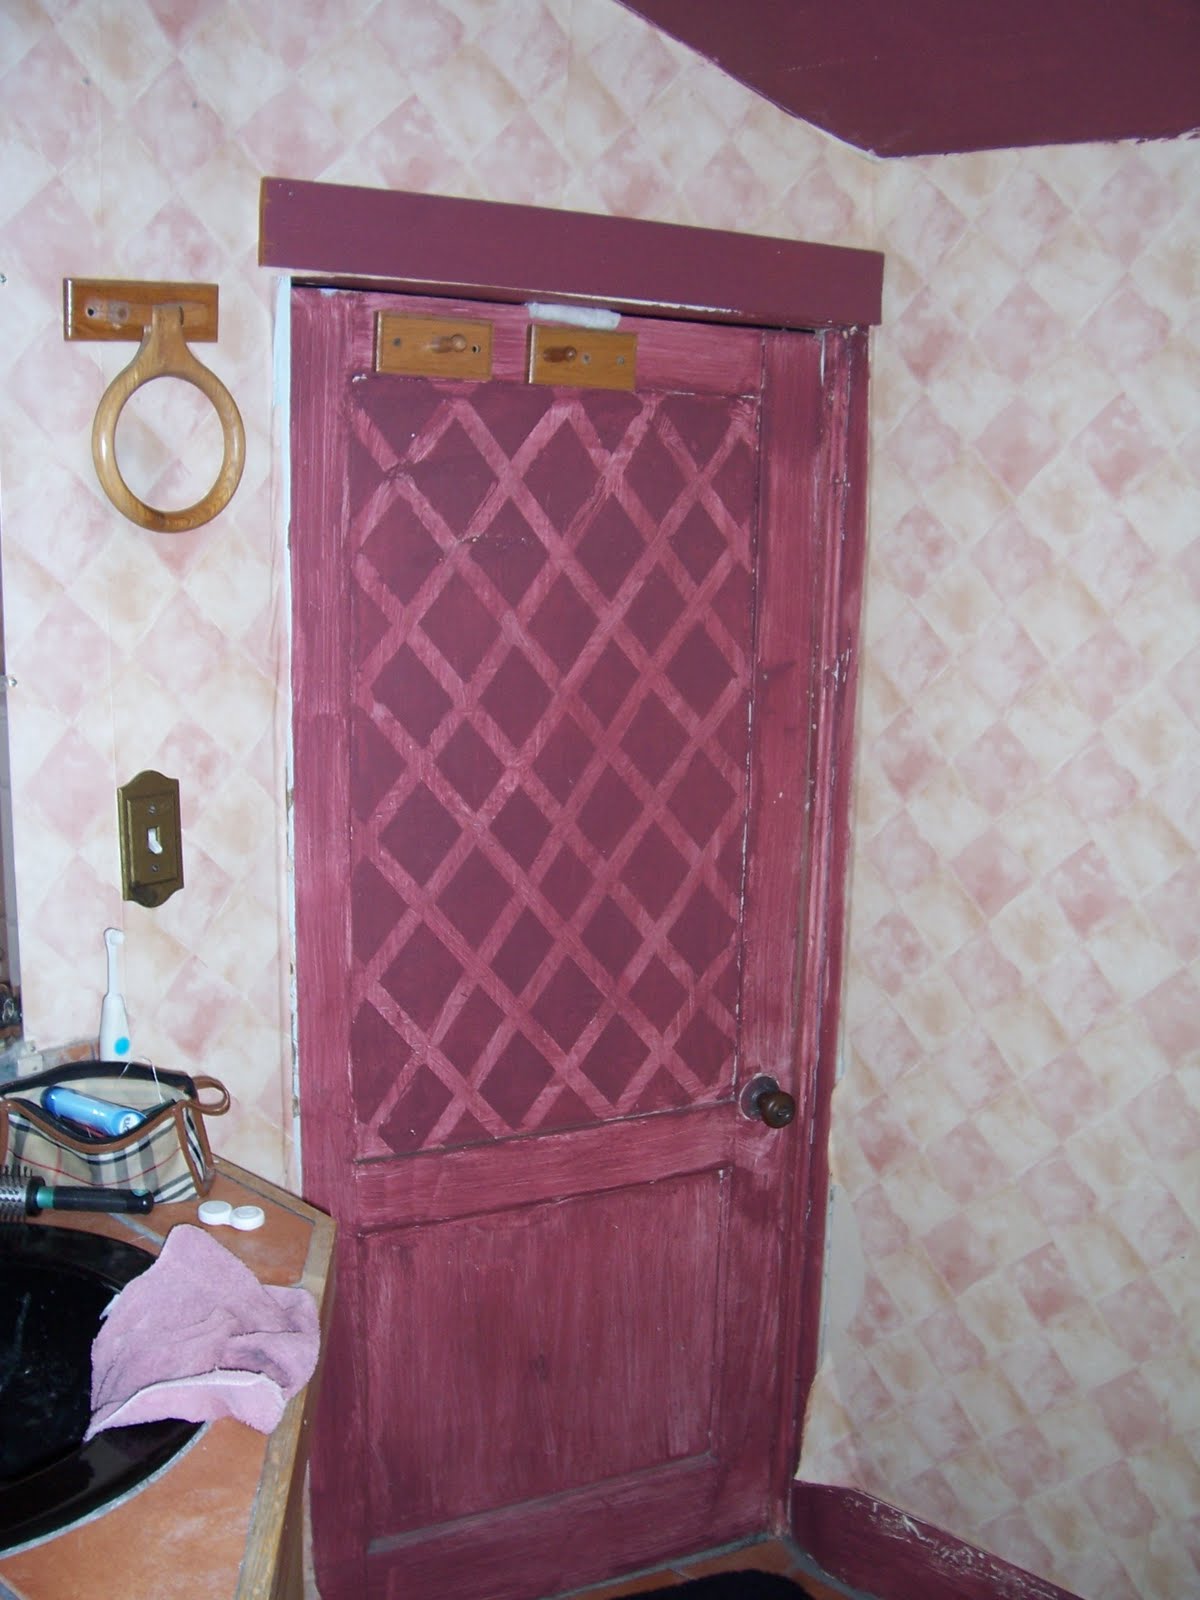
Oh Baby! This bathroom is HOT! The tub is on blocks because the clawfeet are missing! Sweet!


It actually is a very fun bathroom, but it needs a new look!

This is the room we are working on right now. It is going to be the baby's room. This is the before.


We knocked out the lathe and plaster. The kids love destroying the walls.


We put in insulation, updated the electrical and started hanging sheet rock! Unfortunately, we had to tear out the built in window seat because there was so much cold air coming in through it. It was open to the outside porch below!


I would love any help decorating this room. We plan to rebuild the window seat and put shelves up both sides of the window since it doesn't have a closet. Wouldn't a little board and batten look great up on the vertical walls?


So far, we have the sheetrock up. The kids had to draw their pictures all over it! They love to draw in every room before we paint them.


The other day, we started mudding the room. This will take a while since we are not professionals. I want it to look somewhat nice. The kids think they are "helpful," but it takes a lot more time and more work to clean up from them "mudding." They pick it up with their hands and spread it all over the walls. I just can't say "no" because I want them to feel a part of remodeling the house. I want them to be proud of the work we do. I scrape the mud off the walls after they are done and will have to do a little more sanding!

We have "finished" my daughter's room and I even did a fancy striped paint job, but nothing is on the wall because I am afraid. I dont' know why I have a phobia of putting nails in walls. With just a few of Mandi's ideas, Cadence's room could be so cute!


I could show pictures of just about every room in my house that could use some decorating help. When we redo a room, we do just the minimum. The accessories and decor have to wait until someday when we have more time and money.


I'm begging that Vintage Revivals comes to my house so maybe one or two or three or four of our rooms can look even a little bit better than they are. My sanity is going quickly! It's a strain on my marriage. And some days, I feel sad and depressed to go home to the mess we live in.


Please Mandi (and everyone judging and reading this), choose my family as your project and help make our house into a home. Make my nightmare more bearable. We NEED it!!!


JCrew Spring Dress Knock-off AND A Link to 20 Knock-offs

Tea Rose Home has created another beautiful and feminine masterpiece. She knocked-off a JCrew dress normally priced at $750.00 for $13. The dress looks so comfy and beautiful! Love it!


If you are looking for some more gorgeous knock-offs, you must visit KoJo Designs to see 20 awesome knock-offs. They hosted a knock-off month full of tutorials. Check out all the links and tutorials at KoJo Designs.


3 Great Knock-offs!

Don't bother paying the $46 for a darling J. Crew knock-off dress for your little one. Make it yourself with a shirt from your closet with the help from Naptime Crafters.


The Ivy Cottage knocked-off a Z Gallerie display. What a statement it makes on wall! See the Z Gallerie mirror artwork.


This anthro tank knock-off is super cute! Love the bow and the cascading front. Learn how to make it at Southern Fairy Design.


All these great ideas were linked up to the Whatever Goes Wednesday Party!

Mother's Day Party!


Welcome to the MOTHER'S DAY

Categorically Crafting Show.


where you can show off all of your MOTHER'S DAY Ideas!


MOTHER'S DAY is in ONE week.


What are you creating? What are your planning on giving?

What do you plan on doing?


There are a few amazing Mother's Day projects out there. Here are just a few ideas.Make your mom a handmade card using scrap material and your sewing machine! It doesn't get much better than that! Aren't these simple cards made at Kojo Designs adorable?


If your mother is a grandmother, this seriously is the perfect gift! Remind her of all her family members (kids, grandkids, great-grandkids) and their birthdays with this fun birthday board. See it HERE from A Little Bit of This...A Little Bit of That while she guest posts at Poppies At Play.


This is one gift a mom would absolutely cherish! Pictures of her kids spelling their favorite word. Make it for your sister (with pictures of her kids, silly) or tell your husband to do it for you! Visit Ready, Set, Create to read more about it! GO HERE.


Every mom loves some accessories!!! I love this brooch with three different kind of flowers. Pin on a shirt or bag, it's gorgeous! Go HERE to The Scrap Shoppe to see how to make it!


Pamper mom by making her some spa-like slippers and giving her a pedicure! A nice long massage would be nice too! See how to make these at Pickup Some Creativity.


We'd love to see your MOTHER'S DAY ideas.


Please join your crafty post if, and only if, it corresponds with the category and theme of MOTHER'S DAY. (If it doesn't fit in this category, please link it up to Whatever Goes Wednesday.) Link up crafts, decor, sewing projects, food, tips, etc, that has to do with MOTHER'S DAY. If you have joined a MOTHER'S DAY project to a party on my blog before, feel free to add it to this show too! If you have a lot of turkey projects, please choose your favorites. (Please no more than 4 posts per blog). Link to the specific posts, not to your main blog page. Let's see what you have created (either recently or in the past)!

.

You can paste the "Categorically Crafting" button onto your blog post. I would love to see these floating around so more people can post their themed projects. I will leave this linky post open until AFTER MOTHER'S DAY so you can link up after you post. Keep checking back for more ideas!!


Have You Met Quinoa?


Quinoa could be considered a super food from everything I've been reading! I'm sure you've heard by now about all of the benefits of this seed. Yep, it's a seed that is most often typecast as a grain for it's tender fluffy texture once cooked. It's actually a seed from a plant that is related to spinach, beets, and chard! Everything you've heard seems to be true. It has a ton of health benefits. It's a complete protein, meaning it contains all 9 essential amino acids, it's easy to digest, and is chock full of vitamins and minerals. One of my favorite things about this "whole grain" is that it is a good source of magnesium, a mineral I find that is often overlooked and forgotten. I've been upping my dietary intake of magnesium to combat my migraine headaches.

I'm thrilled that this ancient nutrient is becoming a more mainstream health food. Thus, it is becoming ever easier to find tasty recipes for it. I suppose it is an acquired taste, but well worth the effort. My kiddos weren't thrilled with the recipe, although they did eat it. I have committed to cooking it at least once a week. I was re-inspired to pull this couscous look alike out of the pantry from a new book I bought today. I browsed the pages at Barnes and Noble today and came home and bought it on my Nook. Yay, one less cookbook in my cabinet! It's called Pretty Delicious by Candice Kumai. I made her Quinoa Pilaf that is a mixture of  quinoa, toasted almonds, dried fruit, and basil, dressed with olive oil and balsamic vinegar. Although it was served hot at dinner, I suspect it will be just as tasty served cold. I LOVED it, the kids don't really like nuts or dried fruit so their distaste was to be expected.

There are so many options and advantages, I urge you to Google more about it. I Googled "benefits of quinoa." I'm sure "quinoa recipes" would also garner great results. It's not only healthy, but it's quick to make, taking only about 15 minutes. Remember to rinse it thoroughly before cooking and enjoy it hot or cold, in cereal, or even in the form of ground flour, sprouts, or pasta.

I'm eager to try new quinoa recipes, so feel free to leave a link
in the comments section if you have one to share.
signature2

GroopDealz - 72-hour Food Supply Kit


GroopDealz has an amazing deal going on today until Sunday through midnight. It is a 2-Person 72-Hour Food Supply kit. In the case of an emergency, this is part of what you need to survive!!!
The 2-person 72-hour supply is a perfect addition to any 72 hour kit. It comes in a small,easy to store 1 gallon container and the best part, is that it tastes great and can last up to 25 years! As with all of their food storage products, its 100% vegetarian and contains no harmful preservatives.

This deal is ONLY
$46 for a 2 Person 72-Hour Food Supply Kit

with Free Shipping ($82 Value) .

That's 44% off the regular price.

Two years ago, we had a mudslide/landslide in our neighborhood when a canal gave way. Three people were killed, houses were flooded and people were forced to evacuate. Those who were prepared felt much more peace despite the turmoil than those that had no preparation at all. $46 is a small price to pay for some preparedness.


Check out the 72-Hour Food Kit GroopDeal.


Faux Tiered Ceiling

This idea from Kammy's Korner about making your flat ceiling looked tiered is AWESOME!!!! What a great visual effect it adds to a room. All she used was some chair rail and paint. Inexpensive and fabulous!!!


Free Personalized Sesame Street Song by Elmo


Go HERE to get a Free personalized song sung by Elmo with your child's name in it!
Use coupon code: myelmo
Choose your child's name, click next and then choose the blue "I just want my free tracks" to download.

I have previously purchased CD's from this company & my daughter LOVES hearing her name included in each song. Enjoy!

Giveaway Directory #54


<center><a href="http://somedaycrafts.blogspot.com"><img src="http://4.bp.blogspot.com/_lpwMUU4tgPw/S7SkXR_QBAI/AAAAAAAAGxg/GaXcfeDpM5k/s400/givedir.png"/></center></div>


Here is your best chance at FREE stuff on the web!!! Join these giveaways!!!! If you don't know what this is, the giveaway directory is a place to promote a giveaway on your blog of your "goods" (or even someone else's). Link up the giveaway.


.

If you are looking to win free "stuff," visit the other blogs and enter. It's that easy!!!! Some of these giveaways only have a few entries so your chance of winning is great!


.

I only leave this link open for 48hrs because giveaways are time sensitive. So if you are going to have a giveaway in the future and want to link it up here, please plan it accordingly:)


Some Party Beauties!


I never could highlight all the beautiful and tasty creations at every party! It's so hard! But here are a few that I love!!!!


Seven Thirty Three made over her master bedroom and it is to die for!!! I'm loving the colors and design. But most of all, I love that beadboard wall headboard! It looks awesome!


I'm loving this ruffle refashioned shirt from See Kate Sew! Darling and super stylish!

Chameleon Girls made this outrageously cool book lamp! Such a great idea for one who loves books (and can part with a few!!!)

What do you do with all those plastic eggs left over from Easter? Especially the ones that have one side broken or lost? Well, you should make a few into these plastic egg tea cups like The Moody Fashionista. Such a fun idea!!!


I want to plant some flowers in some rain boots! I love this spring display from Blueberry Craft and Hobby Time.


Check out more links from the Whatever Goes Wednesday party!


Whatever Goes Wednesday #63


Welcome to this crazy day of linky love and blog exploration! I love to see what is new out there in blog land. Get started clicking away to view everyone's creations!


NEW SPONSOR


Visit Southern Scraps for some amazing homemade cards, jewelry and more! Grab a couple of cards for Mother's Day and more!


MOST VIEWED LINK LAST WEEK!

Apparently, many of you have either cracked your i-Phone or are interested in how to replace the glass in it when it happens! C.R.A.F.T shows you how to replace the glass in your i-Phone for much less than the phone store or buying a new one!!!


. BLOG TIP FOR THE WEEK!


This week's blog tip is brought to you by Welcome To Linneyville. (Found via Binge Crafter.)


Get instructions/tutorial on how to make a button for your blog. If you don't have one, take the time to learn today!!!!


Don't forget to check out the Giveaway Directory tomorrow! It amazes me how few people enter giveaways. This is your chance at free stuff! FYI, this link is only open for two days. If you are going to do a giveaway and want to feature it here, make sure you link it up sometime on Thursday or Friday.


.The Mother's Day Categorically Crafting show will start Friday, April 29th. I hope to see ideas for grandmothers, mothers, sisters and women in general. We want to see some great Mother's Day ideas we can use!!!


You know what to do. Enter your project (up to 4 links), tip, idea, recipe, whatever. Visit others. Leave comments. PLEASE NO ETSY SHOPS! Come back again in the next few days more projects are added throughout the week. Let the fun begin! (Because blogging is not my full-time job, I will not be able to visit every link. I apologize.)


Happy Home Wall Saying

This happy home wall saying from Creative Carmella is beautiful! I love where and how she hung it in her home! She also shows how she made it.


Check out City Deals in your area today. You can take off an additional 20% off anything (of the already LOW prices) when you enter SUNNY20.

Two Pairs of Short out of One Pair of Jeans

Naptime Crafters has a brilliant idea for a pair of jeans with holes in the knees! She turned her's into shorts for her and her daughter! How cool to get two pair of shorts out of one set of jeans! Great upcycling idea!!!


Check out City Deals in your area today. You can take off an additional 20% off anything (of the already LOW prices) when you enter SUNNY20.

How to: Storage Baskets

Storage Basket

How-to provided by www.jcarolinecreative.com

storage basket front
storage basket top

Fabric is Peapod and Leaflet from the Modern Flora Collection. Baskets are lined with Herb.
Materials Needed for Large Storage Basket (finished size 12" wide x 16" deep x 10" high). Materials needed for Small Basket (finished size 8" x 8" x 12") are shown in parantheses if different.:
  • 1 yard of exterior fabric (1/2 yard for smaller basket)
  • 1/2 yard of interior lining fabric
  • scrap of fabric for label holder
  • 1 yard heavy stabilizer (1/2 yard for smaller basket) (I had the best luck with Super Heavy Stabilizer B0509, but you could also usePeltex 70 or Timtex. If you are unhappy with the stiffness of your basket after the basic shape is sewn, the instructions include a way to fix it with some additional interfacing.)
  • 12" x 16" piece of closed cell foam1 for bottom (8" x 12" for smaller basket)
  • 22" of webbing for handles (I used 1 1/4" heavy duty cotton for baskets shown above)
  • 12" of 3/8" Heat 'n Bond Ultrahold (for the label holder).
  • Glue to affix inside bottom to basket (I used Tacky Glue.)
Step 1:

Cut fabric and interfacing.

Large Basket

Exterior Fabric

  • Cut 2 pieces 13" wide x 13" high for front and back
  • Cut 1 piece 17" wide x 37" high for bottom and sides (If fabric is a one-way design e.g. has a definite "up" direction, like Leaflet shown above, cut 2 pieces 17" wide x 19" high.)

Interior Fabric

  • Cut 2 pieces 13" wide x 9 1/2" high for front and back
  • Cut 2 pieces 17" wide x 9 1/2" high for sides
  • Cut 1 piece 15" wide x 19" high for bottom.

Interfacing

  • Cut 2 pieces 13" wide x 13" high for front and back
  • Cut 1 piece for bottom and sides 17" wide x 37" high.


Small Basket

Exterior Fabric

  • Cut 2 pieces 9" wide x 10 1/2" high for front and back
  • Cut 1 piece 13" wide x 28" high for bottom and sides (If fabric is a one-way design e.g. has a definite "up" direction, like Leaflet shown above, cut 2 pieces 13" wide x 14 1/2" high.)

Interior Fabric

  • Cut 2 pieces 9" wide x 8 1/2" high for front and back
  • Cut 2 pieces 13" wide x 8 1/2" high for sides
  • Cut 1 piece 11" wide x 15" high for bottom.

Interfacing

  • Cut 2 pieces 9" wide x 10 1/2" high for front and back
  • Cut 1 piece for bottom and sides 13" wide x 28" high.
Step 1
Step 2:

Print label holder pattern here. Cut out the paper pattern and trace onto the back side of the fabric for your label holder. Cut out the fabric 1/4" larger than the pattern on the inside and outside. On the inside, clip towards all four corners.

Step 2
Step 3:

Using 3/8" Heat 'n Bond Ultrahold, press the tape along all four sides of the label holder. Remove the backing from the Heat 'n Bond. Carefully fold in the center raw edges and press down with your iron. Then fold down the outer edges and press. (If you don't have an adhesive tape, use a glue stick.)

Step 3
Step 4:

Stitch the top edge and the inside edges of your label holder, as close to the edge as possible.

Step 4
Step 5:

Position the label holder on the front piece. Remember that you will be turning down 2 1/2" of the front piece for the facing (2" for the small basket), so if you want it 2" from the top of the basket, place it 4 1/2" below the fabric edge. I used scotch tape to hold it in place while sewing and it seemed to work pretty well (it was too bulky to pin). Stitch the label holder to the front along the outer unstitched edges, as close to the edge as possible.

Step 5
Step 6:

If your exterior fabric has a design that runs one way, sew the two bottom/side pieces together at their bottoms using a 1/2" seam allowance and press open the seam. (Check the direction of the print before you sew.)

Step 6
Step 7:

Take your pieces of interfacing and trim them down about 3/8" on the top and side. Place the exterior fabric pieces right side down on a flat surface and center the interfacing on its corresponding piece of fabric. Pin in place around the sides. Baste (the longest stitch on your machine) the interfacing and fabric together with your sewing machine within the 1/2" seam allowance. Keep the fabric layer against the feed dogs (bottom of your machine) and you'll find the fabric is less likely to gunch up on you. Repeat for the other two exterior pieces.

Step 7
Step 8:

Mark the center of the long edge of the side/bottom piece (18 1/2" is center for the large basket, 14" for the small). Mark the other edge as well. (I mark it with a nip of the scissors within the seam allowance.)

Step 8
Step 9:

Find and mark the center of the bottom edge of the front and back pieces. (6 1/2" is center for the large, 4 1/2" for the small) The bottom edge is only different from the top edge if your fabric is a one way design.

Step 9
Step 10:

Pin the front and back piece to the bottom/side piece, right sides together, matching the center marks you made in the last step. Mark 1/2" from each side edge of the front and back pieces.

Step 10
Step 11:

Stitch between your marks on the front piece, using a 1/2" seam allowance. Repeat for the back piece.

Step 11
Step 12:

Clip the side/bottom piece where the stitching begins and ends. Be careful to clip just up to the seam. Repeat for the other side.

Step 12
Step 13:

Starting where you finished stitching in the last step, pin the side of the front piece to what will become the side piece. Stitch from the bottom up. Repeat for the other three seams.

Step 13
Step 14:

Trim the seam allowance of all four seams to 1/4" or less. (It helps reduce the bulk when you are sewing around the top.)

Step 14
Step 15:

Cut your webbing or other material you are using for the handles to 11" long. Position the handle on the right side of the front piece, matching the raw edges and centering the handle. The outside edges of the webbing should be 4" - 5" apart. Pin in place and stitch. Repeat with the other handle on the back piece.

Step 15
Step 16:

Sew your front lining piece to the two side lining pieces, with right sides together. Do the same with the back lining piece.

Step 16
Step 17:

Turn the lining right side out. Pin the top of the lining to the top of the basket, matching the four side seams. Stitch around the top of the basket. I opened the seam allowance of the lining, but I didn't worry about opening up the seam allowance of the exterior fabric. I think it actually is less bulky to just let the seam turn in the direction you are sewing.

Step 17
Step 18:

Turn the basket right side out. Don't worry, the stiff interfacing will make it difficult, but just beat it into submission. Use your finger or a narrow object (but not too pointy- you don't want to poke a hole) to push out the corners.

Step 18
Step 19:

Turn down the top of the basket to create a 2" facing (1 1/2" on the smaller basket). You can usually do this with your fingers, but press with an iron if it helps. Pin around the top. If your basket isn't perfect (gasp!), adjust the amount of facing you are turning down to make the basket the same height all the way around.

Step 19
Step 20:

If you feel like your basket is a little too flimsy on the sides, now you have a chance to add some bulk. Cut a piece of heavy interfacing to fit the side plus add 1" to the length. (16" wide x 11" tall). Unpin the top of the basket and stick the interfacing up under the lining into the facing. Pin in place. Fold the extra 1" in interfacing length at a right angle, so it sits on the bottom of the basket. If you want to be extra sure it doesn't flop around, glue that edge to the bottom.

Step 20
Step 21:

Top stitch around the top of the basket about 1/4" from the top.

Step 21
Step 22:

Place the bottom lining face down on a flat surface. Center the foam on the fabric piece. Apply glue 1" all around the edge of the foam piece. Fold the fabric onto the glue and clip with clothes pins until dry.

Step 22
Step 23:

Once the bottom piece is dry, apply glue to the entire bottom of the foam piece. Carefully place the bottom, fabric side up, into the basket. It's easy to get glue on the lining, but use a wet rag to wipe any off. Make sure the lining sides are tucked under the foam piece. Put the basket on a flat surface and place something weighty in the bottom of the basket until the bottom dries.

Step 23
Step 24:

Cut a piece of cardstock 3" x 2" inches and insert it into your label holder.

Step 24
1 Closed cell foam is a dense, thin foam that doesn't compress much. It is usually black, blue or white. It is not the cushy yellowish foam you find in your seat cushions. Where do you find closed cell foam? The easiest solution if you want just a little is to buy Foamies or another brand of foam sheets at a craft store and glue them together to get a thickness of a 1/4" or so. If you want closed cell foam in bulk, find a marine or auto upholstery business. If you're lucky, maybe they will give you a small piece to play with before you commit to a 10 yard roll! I'm sure you could also find it on the internet, but it is bulky (and thus expensive) to ship.

If you can't find any closed cell foam, your next best option is chair cushion foam or cardboard. The disadvantage of chair cushion foam is it has to be thicker (like 1") to provide any rigidity. The disadvantage of cardboard is if it gets crushed or bent, it doesn't recover. It also disintegrates when wet.
copyright 2008 j. caroline designs, l.p.
Feel free to use this pattern and instructions for personal or commercial use. Please do not reprint these instructions without permission. You may link to this page from your website without requesting permission.